In addition to granting access to everyone for your mini-course, enabling access after payment or inviting specific learners to access your mini-course, you can also grant access to your learners after email verification.
Here’s how to turn this feature on: #
- Go to Learners’ Access tab of your collection on your admin dashboard.
- Toggle “Enable access after double opt-in” on.
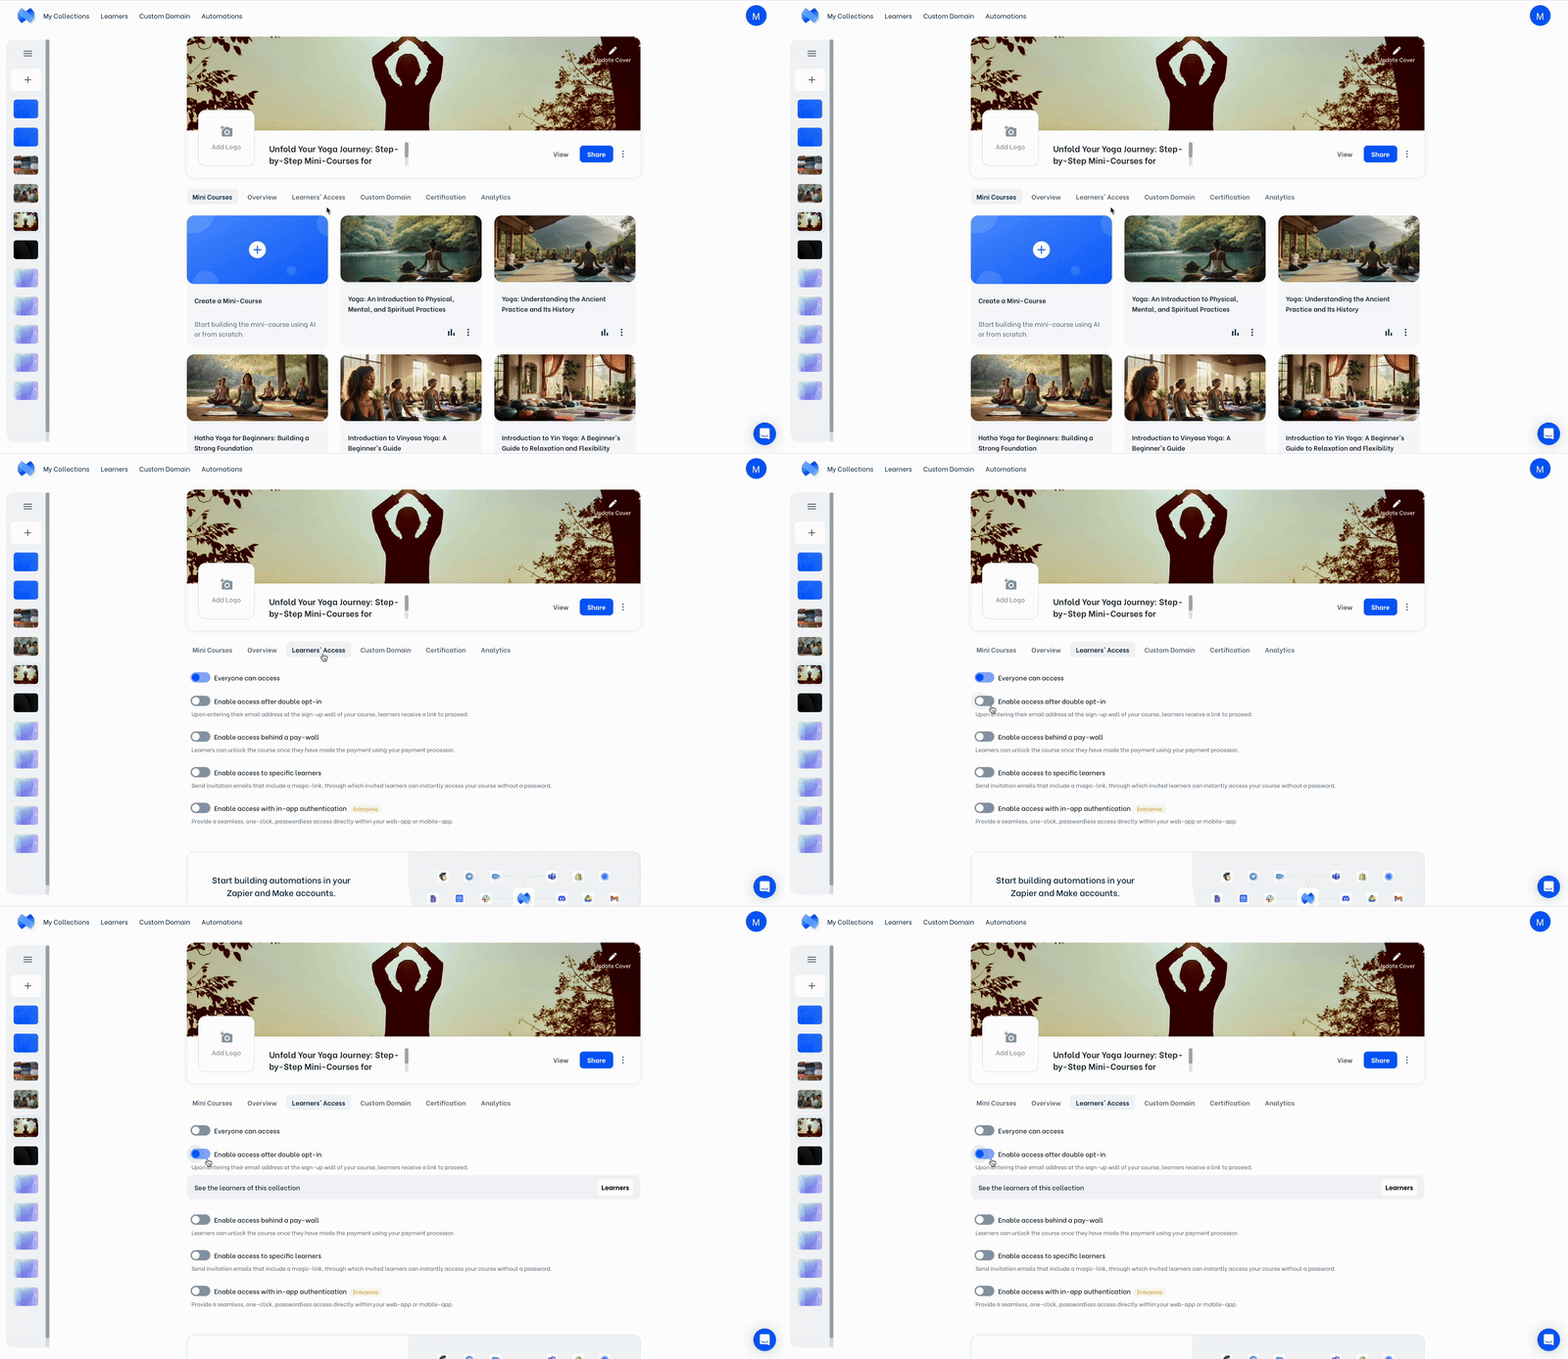

Using double opt-in allows you to use your mini courses as educational lead magnets and effective tools to build relations and engage with your learners.
How do learners access your mini-course? #
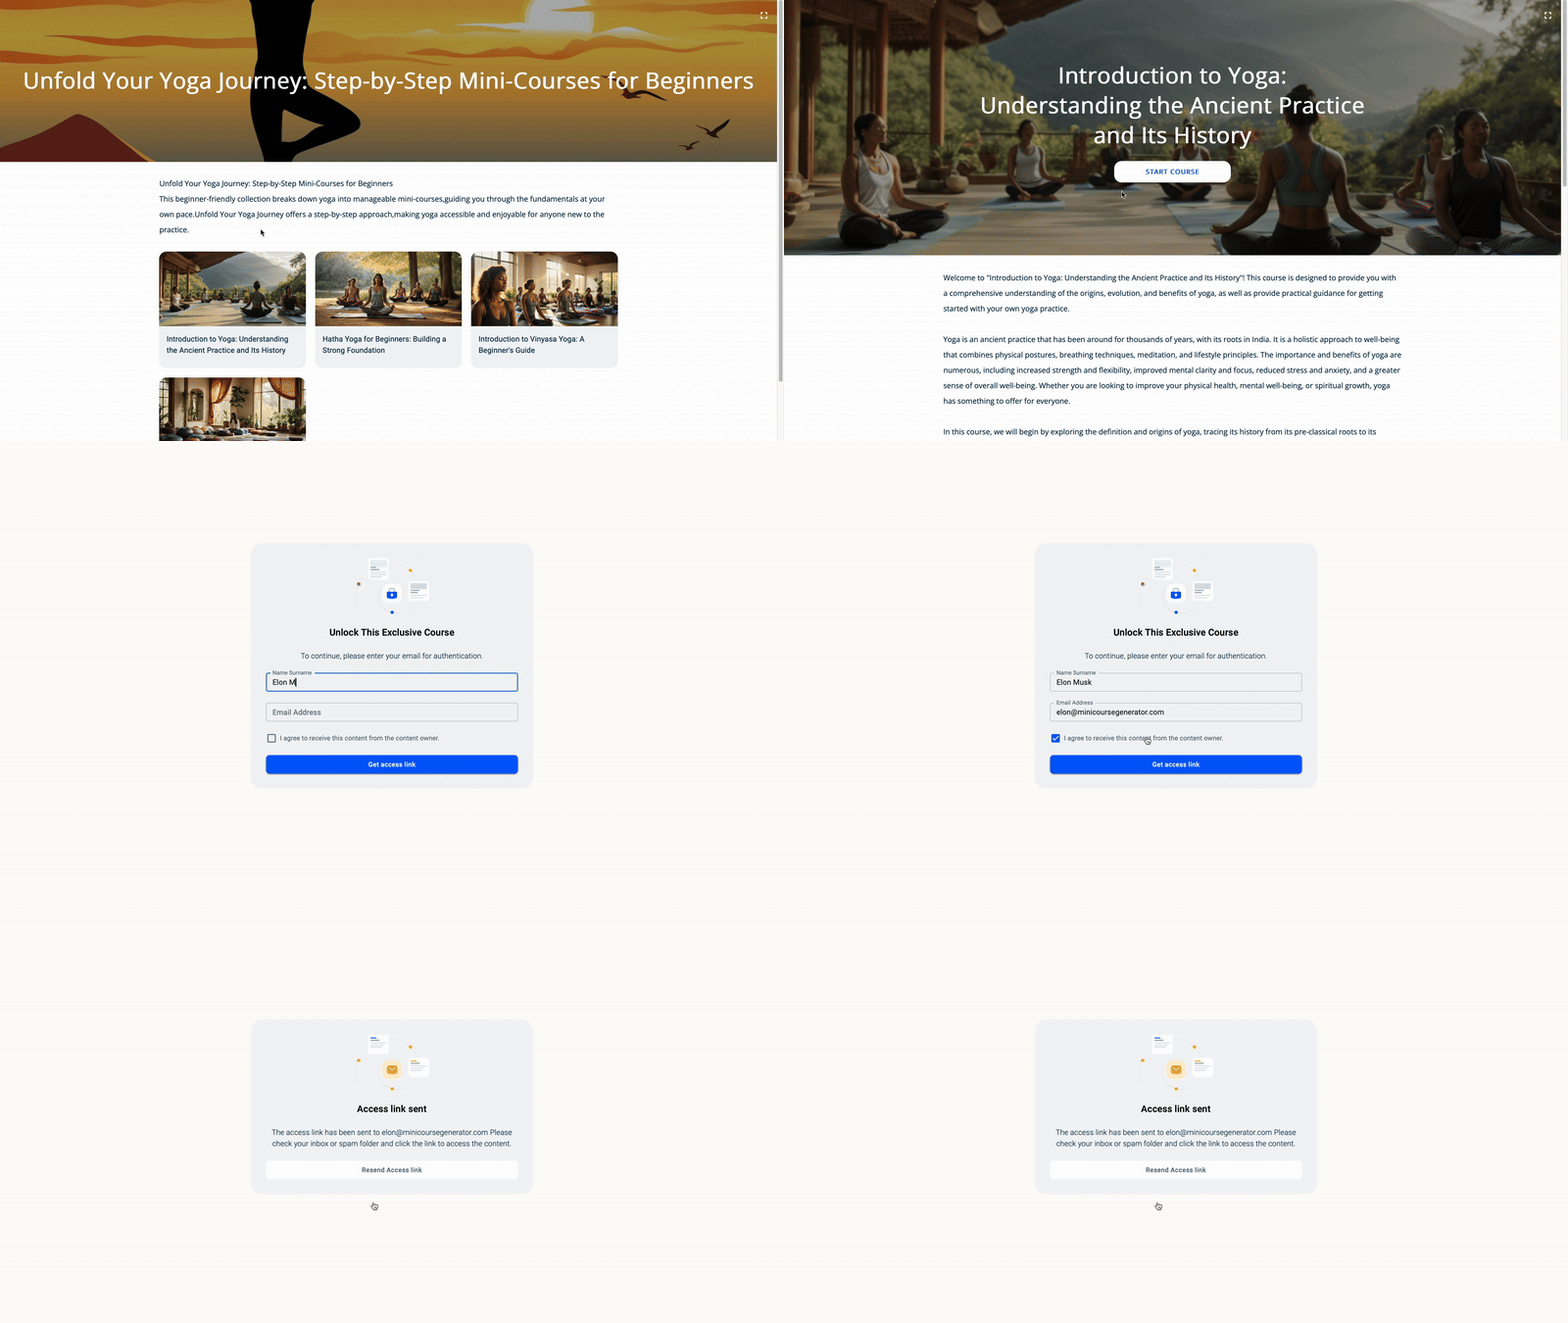
Learners come across a pop-up when they try to access the mini-course. After they enter their name and email address, they receive a confirmation email.
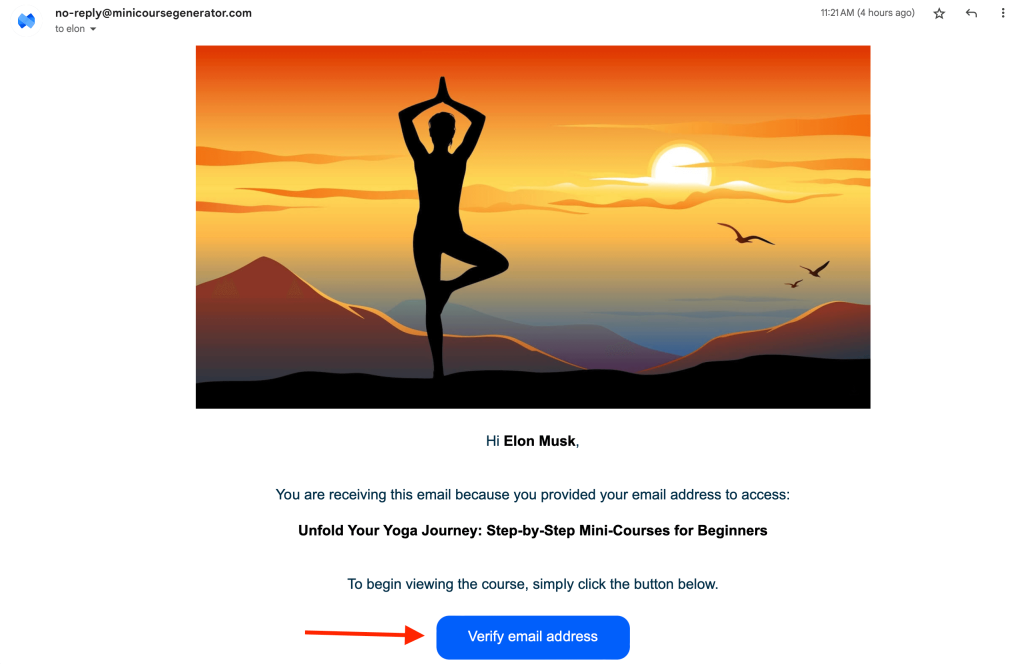
Once the learner clicks on “Verify Email Address” in the confirmation email, they can proceed with accessing your mini-course seamlessly, without any password or any other login barrier.


Suppose that you’re a life-coach, and you use a Discord server for your community. Or, you manage an Instagram account. With such use-cases, pinning the share link somewhere learners can access easily again and again would be useful.
How to change the language settings of your mini course #
Mini Course Generator supports 23 languages besides English. The language setting of your mini-course translates the mini-course interface, sign up and payment experience of your learners as well as the access emails they receive.
Change the language setting of your mini-course by clicking on “Settings” at the top right end of your mini course edit screen. You can find supported languages under the “Language” tab. Choose whichever applicable to you and make sure to save your settings.
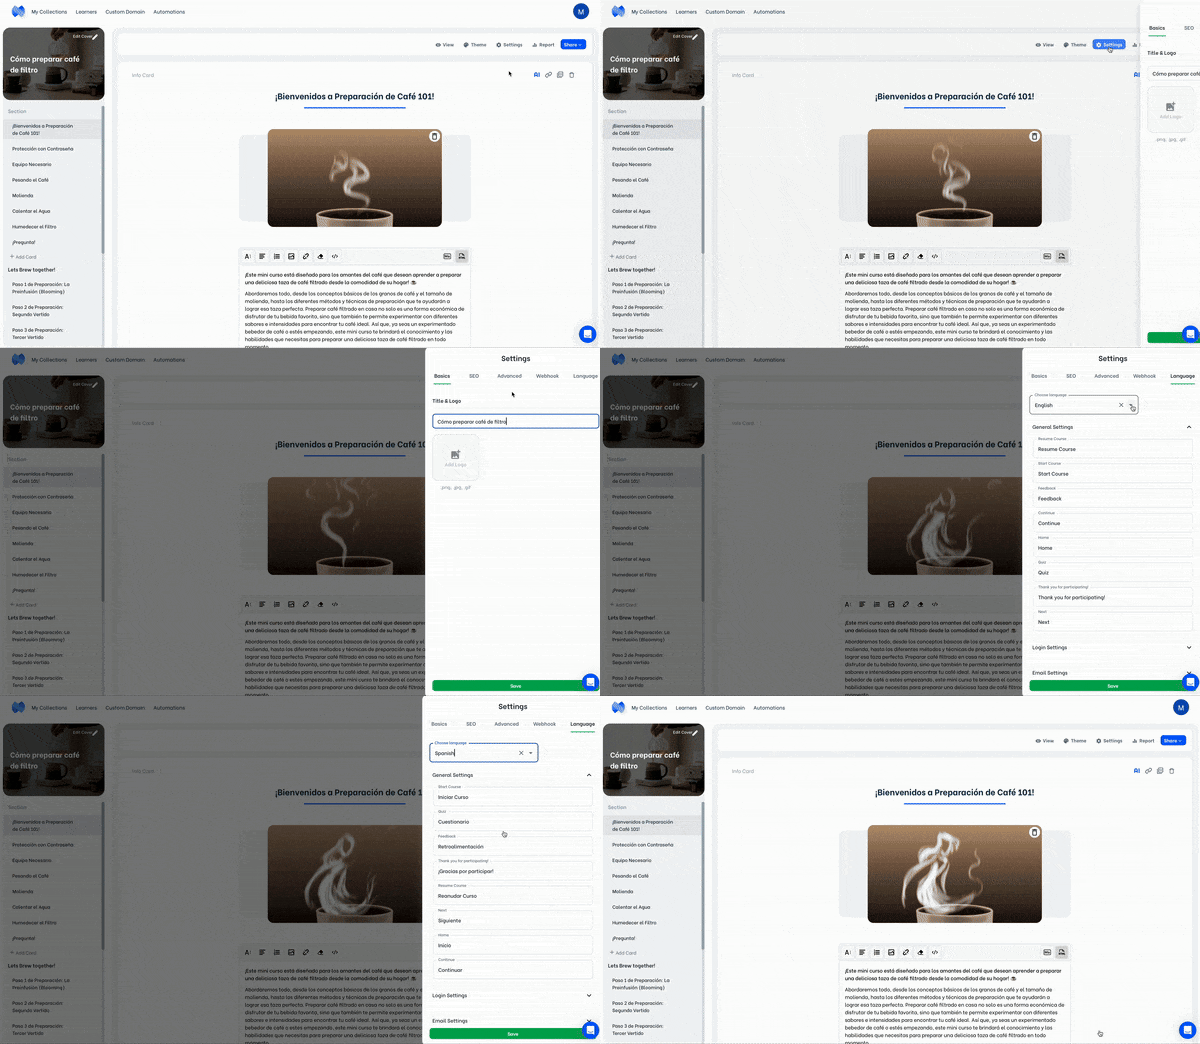
You’re free to customize the text of your:
- mini-course interface ⇒ General Settings
- learners’ sign up experience ⇒ Login Settings
- learners’ access emails ⇒ Email Settings
The sky is the limit with Mini Course Generator!
How to get collected email addresses? #
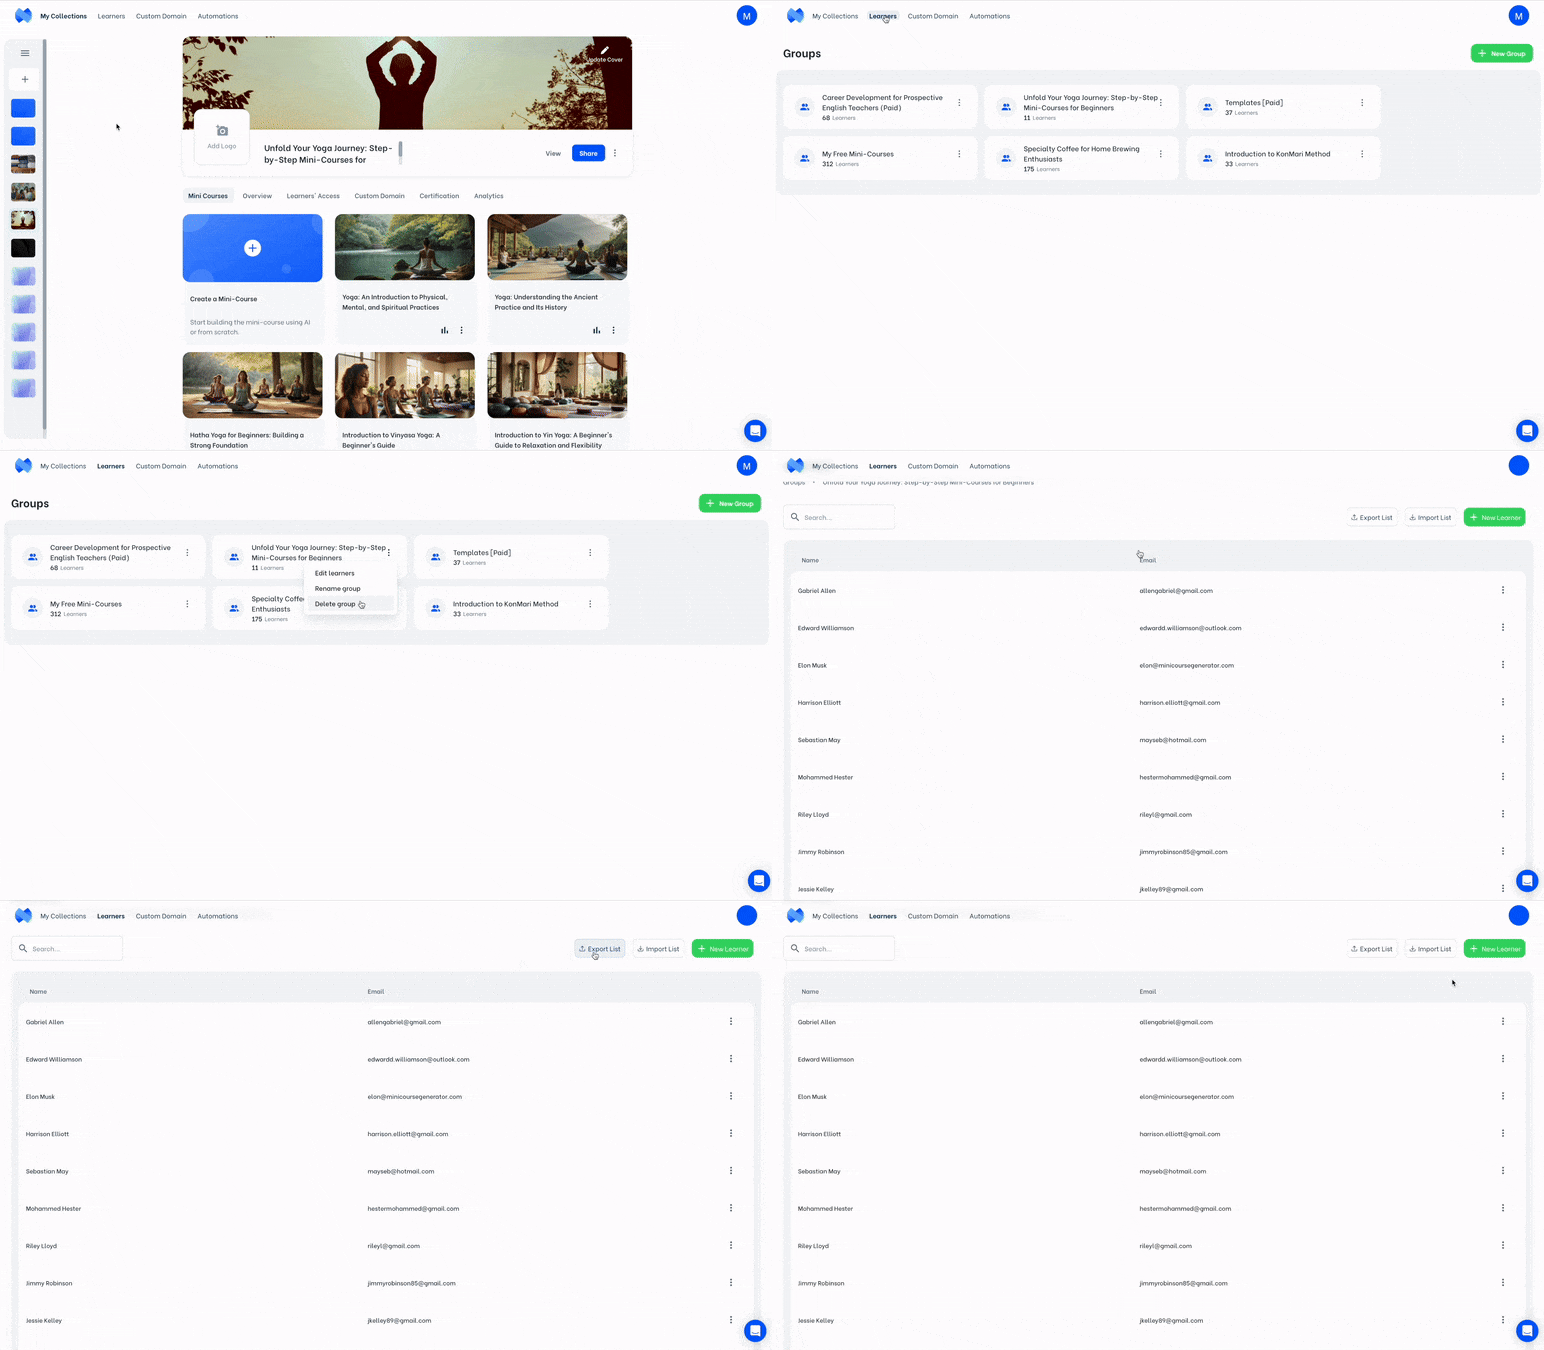
Click on “Learners” at the top of your admin dashboard to see the learners for each different collection. You can edit the learners of a group, rename a group or delete it. You can also create a new group.
Click on a group to see learner data of that group. You can export the list of learners or import a CSV file to easily add many learners at once. Click on “New Learner” to add a learner to your group.
How can I automate exporting the email addresses I collect? #
The integrations of Mini Course Generator with Zapier and Make enable a wide array of automations to use. For example, you can set up a Zap that sends your new learner information to your Google Sheets automatically.

Here’s how: #
- Click here to use the Zap template we’ve created for you.
- Connect your Mini Course Generator account with Zapier.
- Choose the collection for your Zap trigger and test your trigger.
- Connect your Google account to Zapier.
- Create a Google Sheet. Name your sheet and categorize your columns.
Make sure to use the first row of your sheet to create categories such as “Learner Name” and “Learner Email Address” for Zapier to insert data to.
- Do your action settings. Choose your spreadsheet, add learner name and learner email address to your action.
- Test your Zap!


