You may have noticed that except everyone can access and in-app authentication, all learners’ access options require a sign-up process which includes emails being sent to learners.
These emails are sent from the domain “minicoursegenerator.com,” as shown in the image below.
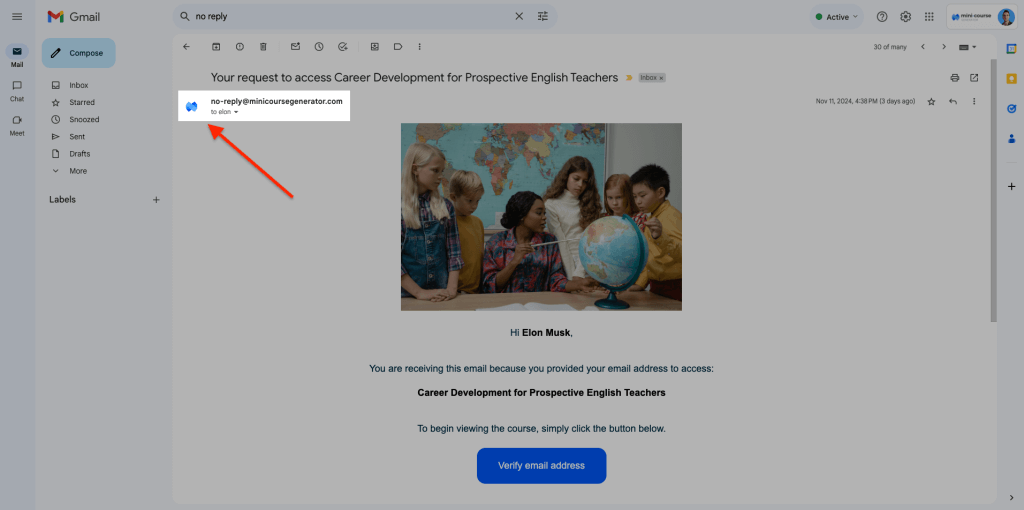
If you’re looking to customize this email address, good news! With a little help from external tools, you can use your domain to send emails from.
Besides, the process will be fully automated, so you don’t have to manually send emails.
Let’s get started.
Key Requirements #
Before diving in, make sure you have the following:
- Your own domain, such as knowup.io.
- A Zapier or Make account. The automation tool will help us connect Mini Course Generator to an email marketing application and create a workflow. Keep in mind that since this automation involves four events, you’ll need a paid plan in Zapier. If you prefer, you can use Make instead. While the interface is different, the process stays the same.
- An email marketing tool to send emails through such as Mailchimp, Mailerlite, etc. Double-check that the email marketing tool you pick works with the automation tool you choose.
- A Pro plan subscription in Mini Course Generator, as the automation requires the “enable access to specific learners” setting.
Prep Work #
Take these steps first:
- Create an email address to send emails from.
- Pick an email marketing tool, set up an account, and add your domain. Make sure to go through any additional setup steps specific to your tool. For example, in Mailchimp, you’ll need to create an email audience and authenticate your domain.
- Change your collection’s learner access setting to “Enable access to specific learners.”
How to Set Up the Automation #
For this guide, we’ll use Zapier as the automation tool and Mailchimp as the email marketing tool.
The automation will have four events:
- New Learner in learner group – this is the trigger that kicks off the automation.
-
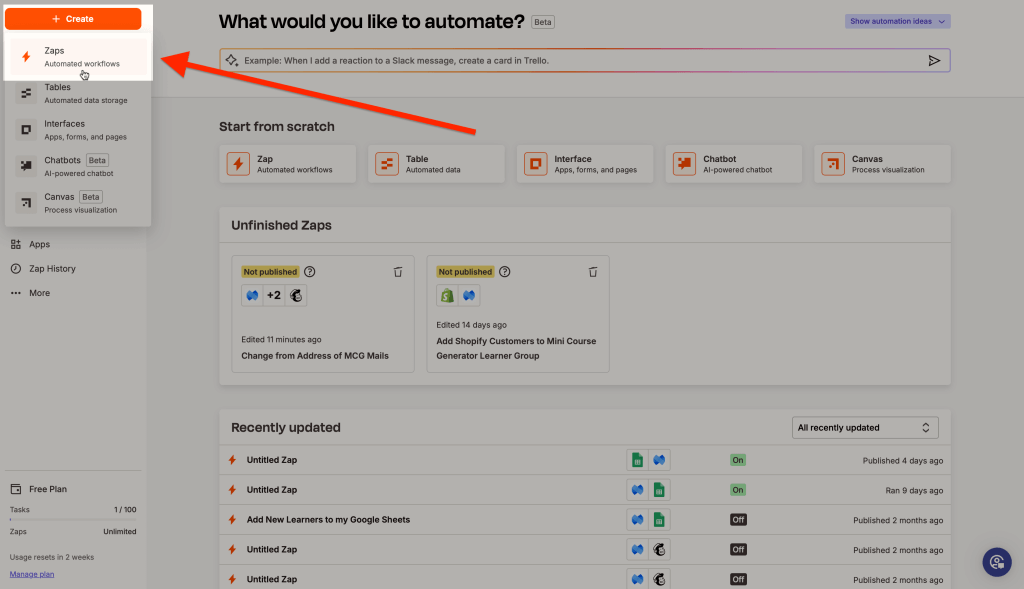
- Create a Zap by clicking the create button on top left end of Zapier dashboard.
-
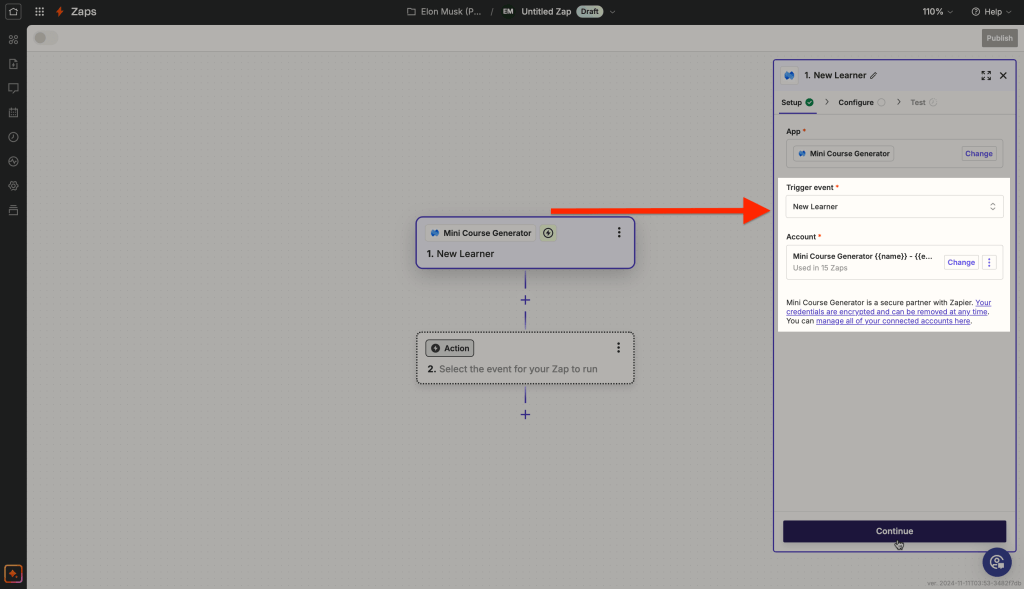
- For the first event of automation, choose Mini Course Generator as the application.

-
- Choose New Learner as the trigger event and connect your Mini Course Generator account. After you’re done with this, click Continue and move on to Configure.
-
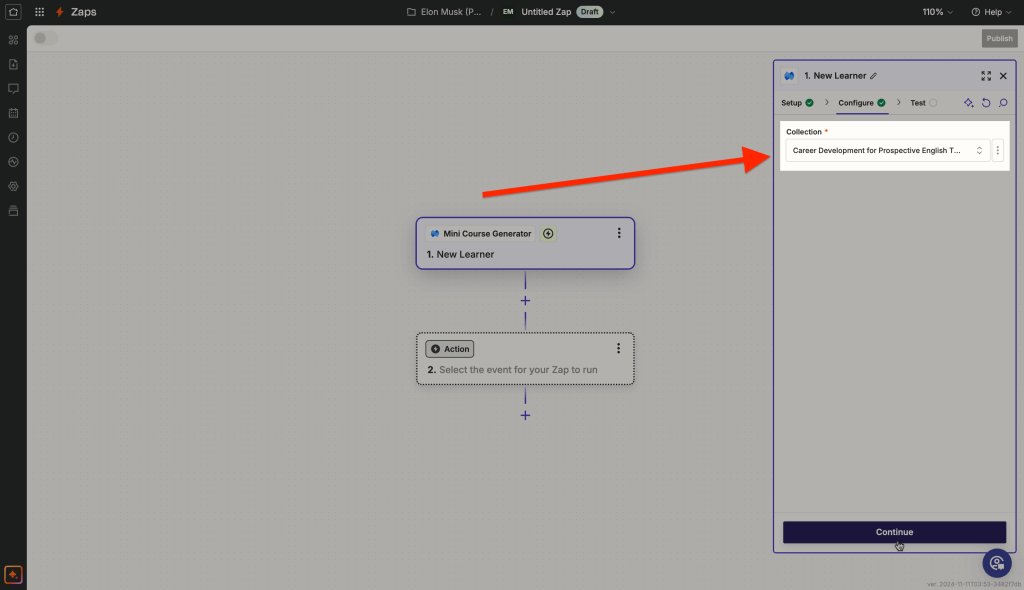
- Choose the collection you want to automate, click Continue, and test the first event.
-
- After testing, choose a learner record and continue.
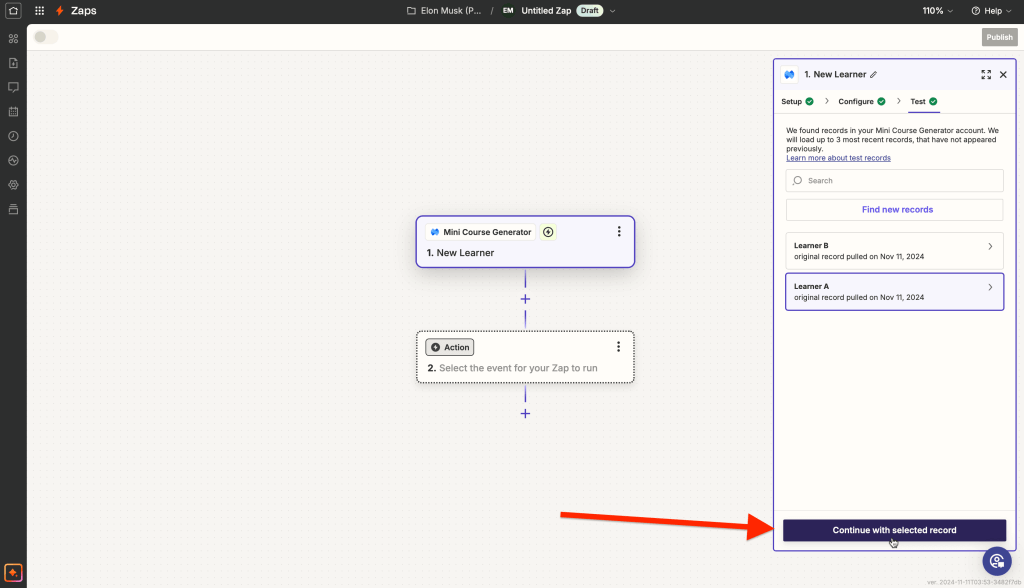
- Add Learner – generates the verification link.
-
- Choose Mini Course Generator application for the second event, and the event Add Learner.
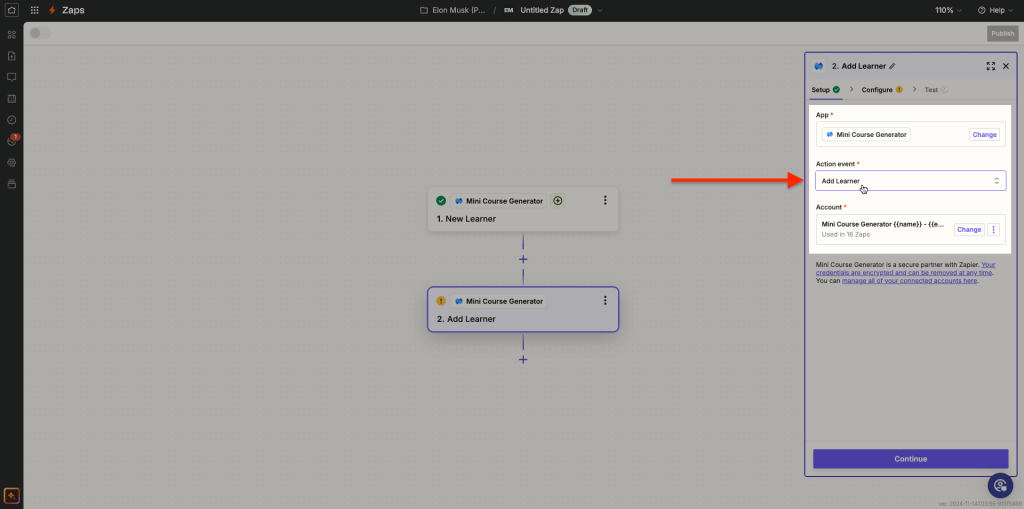
-
- Configure the Add Learner event as shown below. Choose the collection you want to automate and any course in the collection, set “False” for send email, collect email and name data from the first event. When you’re done, click continue to proceed to test. Test the second event and continue.

- Create an email – the email includes the verification link.
-
- For the third step of the automation, choose Mailchimp as application and create campaign as event for the third step. Connect your Mailchimp account to Zapier. When you’re done, click continue to configure this step.
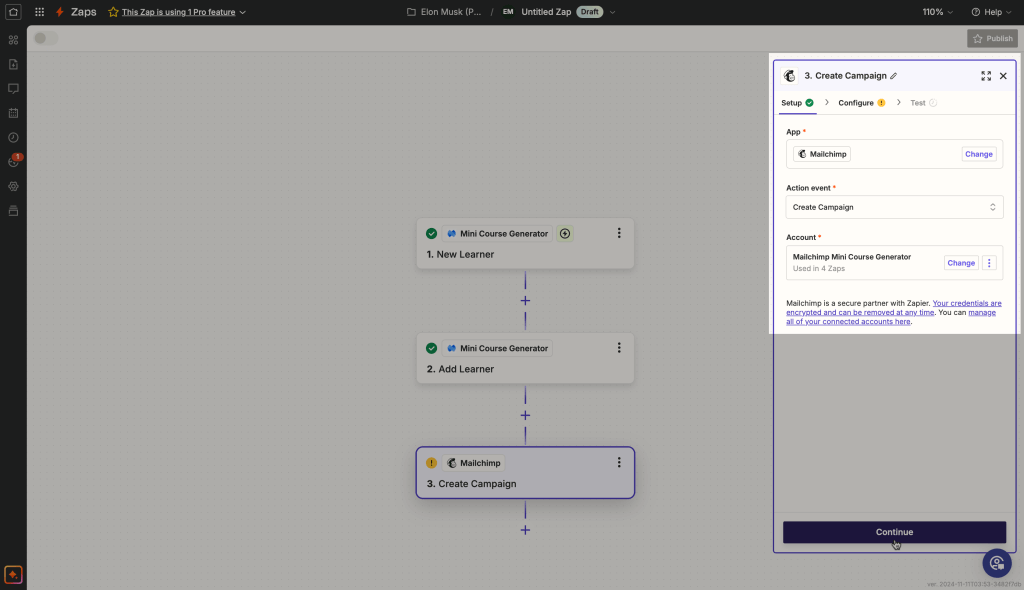
-
- Configure your email campaign. Make sure to include the dynamic attribute magic link in the email body, otherwise the learners won’t be able to access the content. When you’re done, test the third step and proceed.
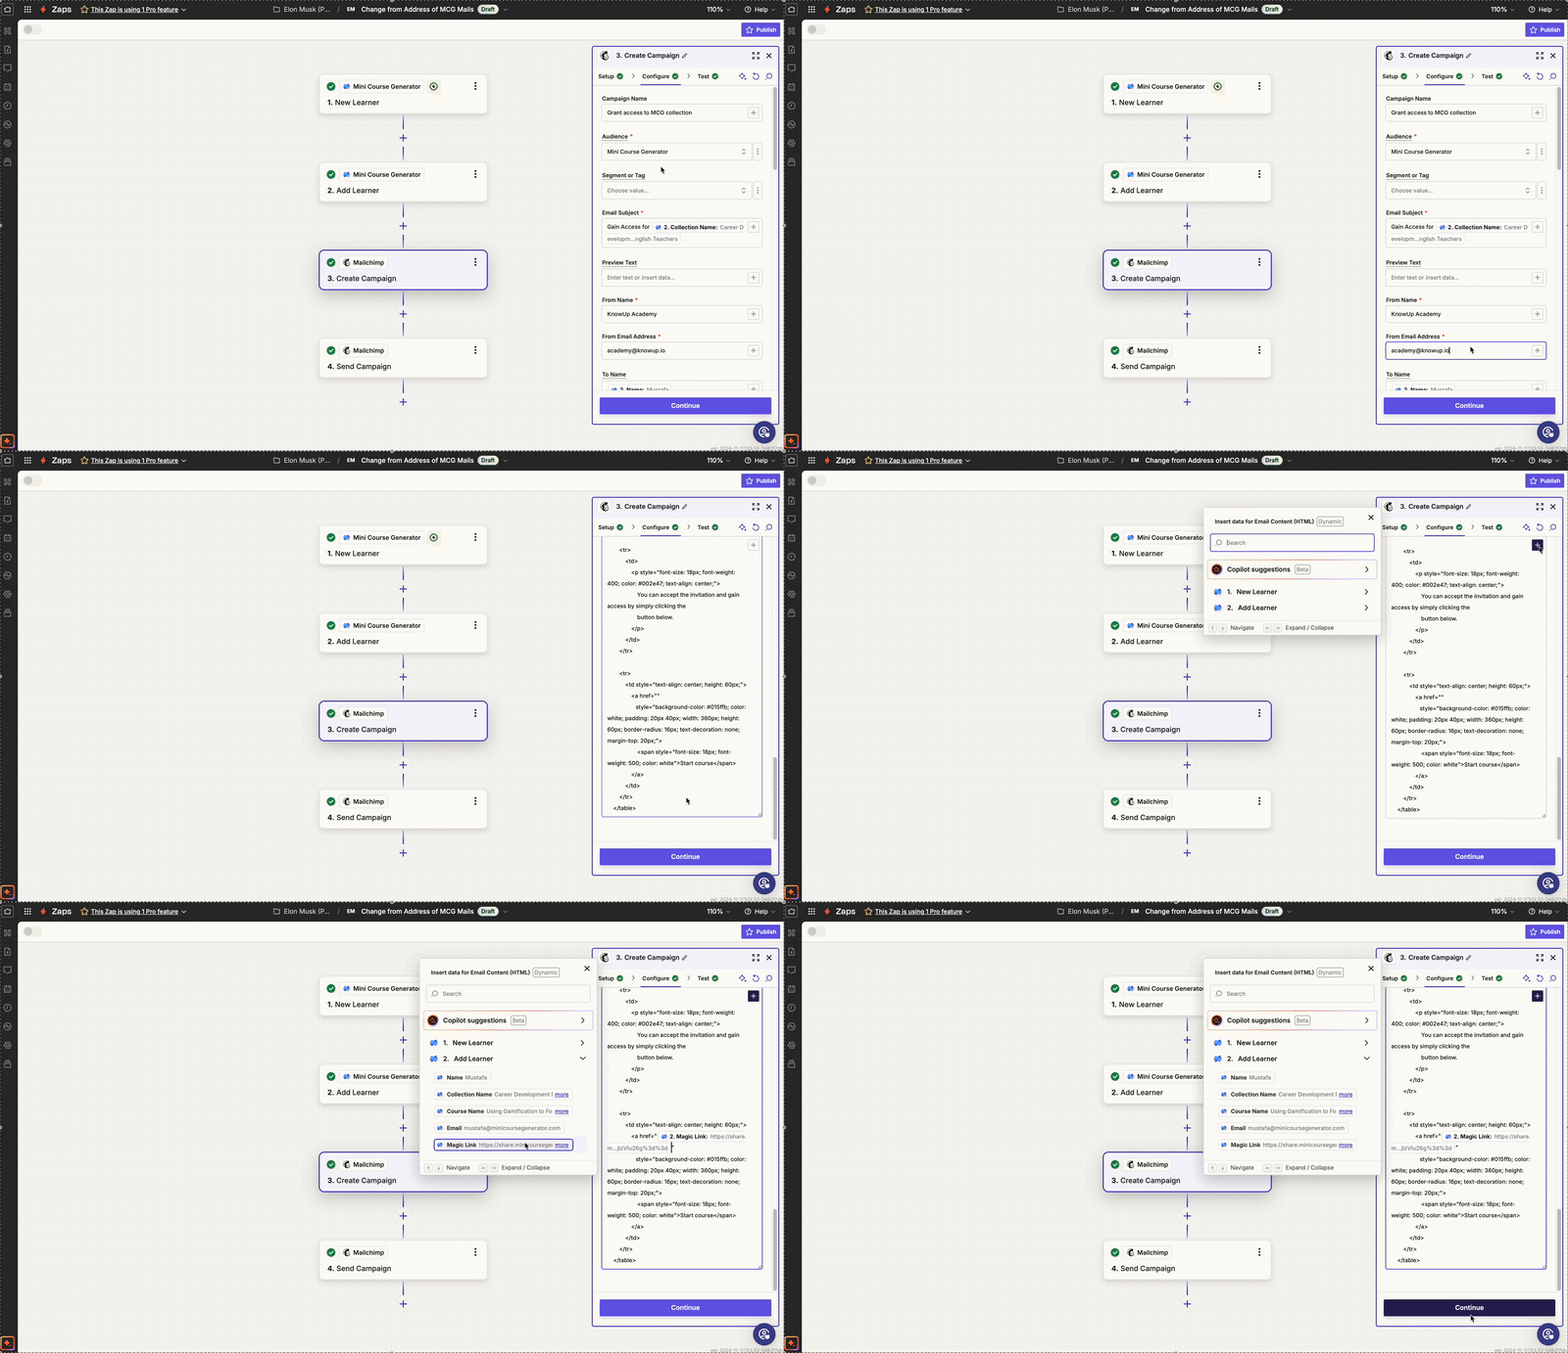
- Send the email – deliver the email to the learner’s address.
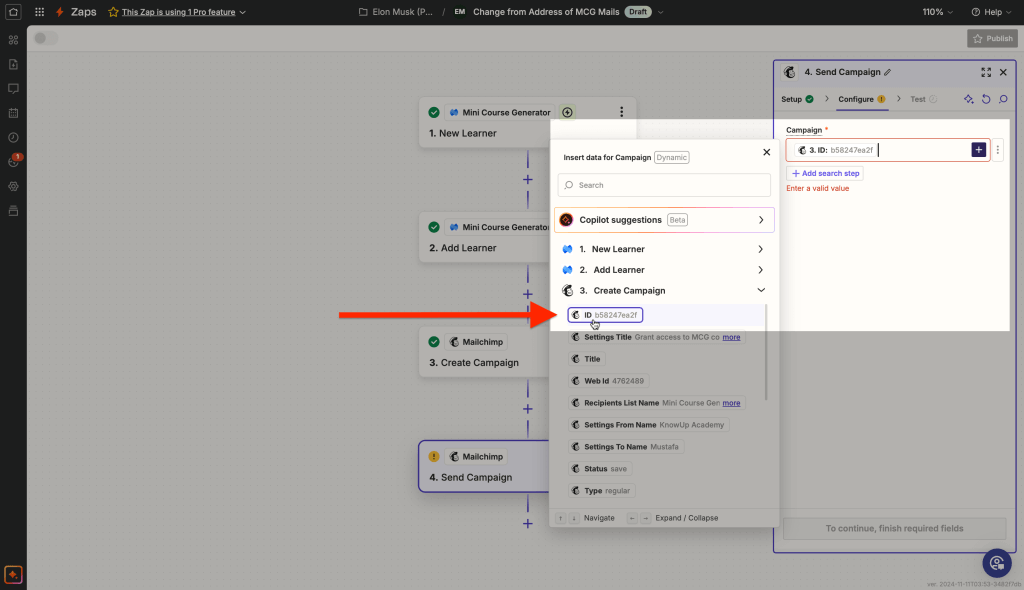
- Choose Mailchimp as application for the fourth step and Send Campaign as event. Configure this step to send the campaign created in the third step, by using the campaign ID data dynamic attribute.
-
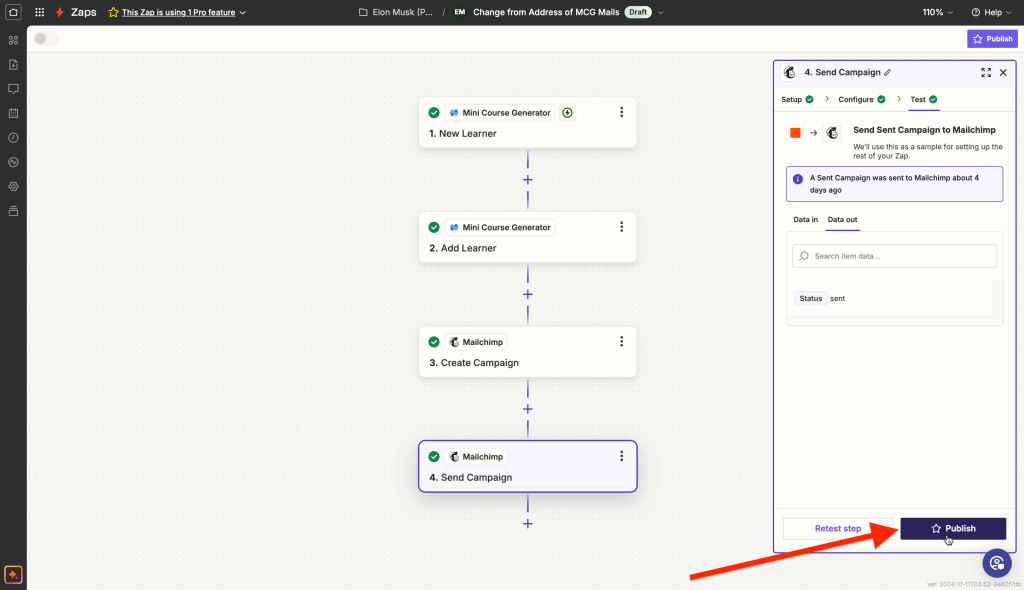
- The automation should look as shown in the image below. Click Publish to make the automation go live.
And you’re done! Setting this up is straightforward and offers a great advantage: customization. By using your own domain and email tool, you create a seamless and branded experience for your learners. This simple yet powerful approach will make your mini-courses feel more professional and personalized.


