Mini Course Generator offers seamless content sales processes through its pay-wall integrations. However, it is also possible to use other points of sale, such as Shopify. You can use Make to automate giving access to a new learner who purchased your content through Shopify.
Make is an automation tool which helps you build scenarios that connect apps together. In this case, we will use Make to connect Shopify and Mini Course Generator. Currently, Make offers a free plan which allows up to 1000 operations per month. For further details, please check their website.
To realize this automation, you need the “Enable access to specific learners” feature. This feature allows your content to be reached exclusively by a specific learner group, or multiple learner groups. Please check our article on this feature for further details.
Build your Automation #
- Change your collection’s Learners’ Access setting to “Enable access to specific learners”.
Automation tools can only collect data from collections which use access settings other than “Everyone can access”. Therefore, before starting to build your automation, change your learners’ access setting.
🔹 Learner data which comes from an automation tool is added to a separate learner group specific to the automation tool and collection. After setting up your automation, check your learner groups and add the new learner group created.
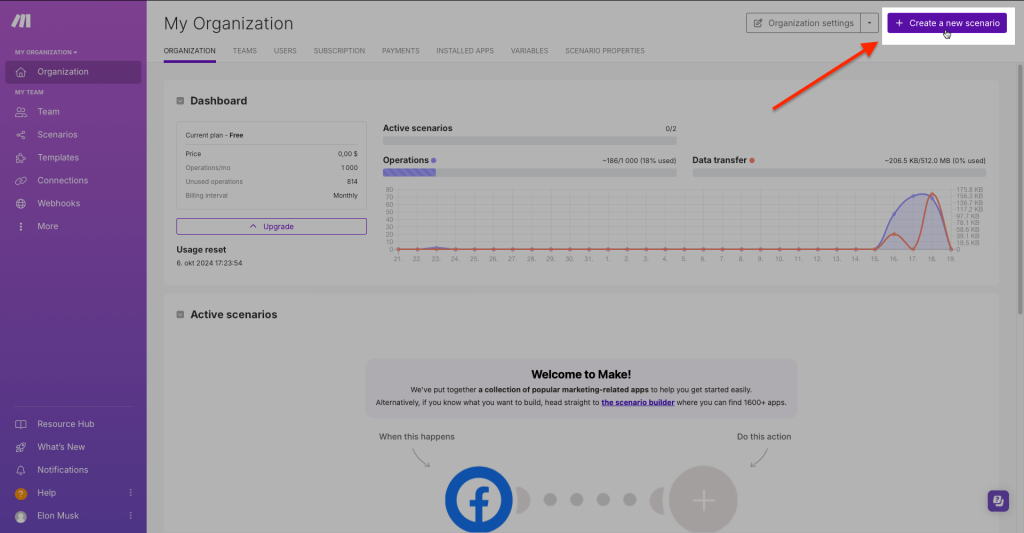
- On your Make dashboard, click on “Create a new scenario” button on top right end.
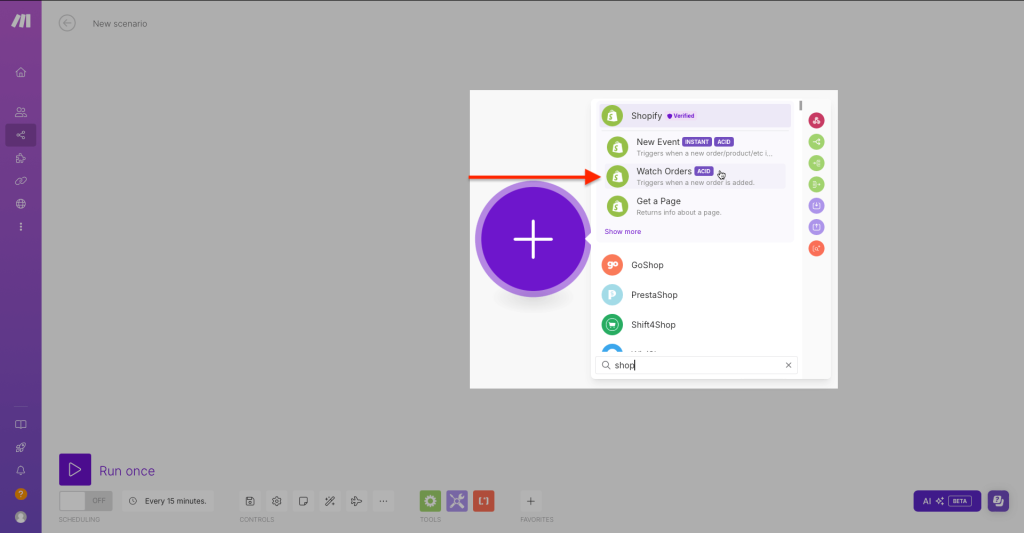
- First module is what triggers your automation. Choose Shopify for application and “Watch Orders” for the event.
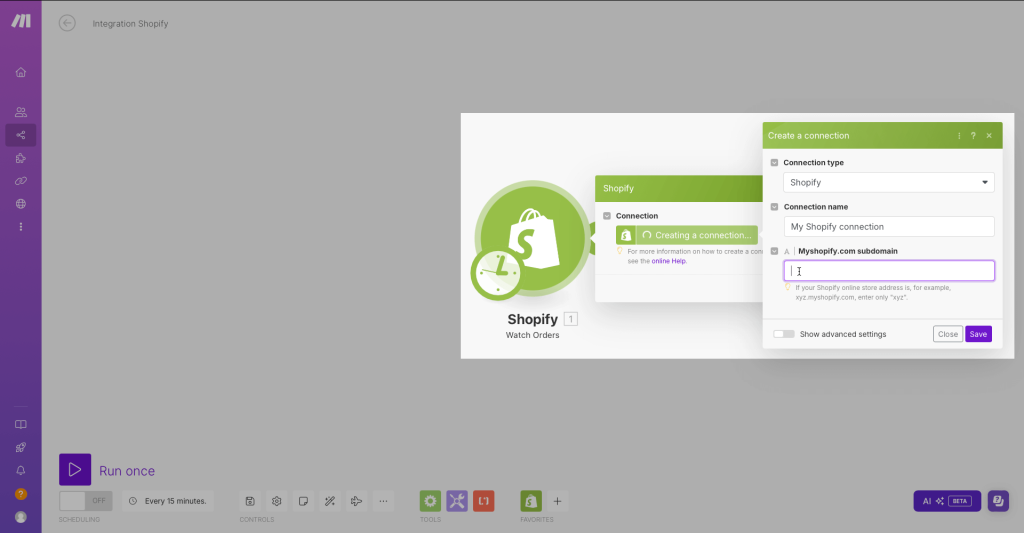
- Provide your myshopify.com subdomain to connect your Shopify account with Make. For example, if your Shopify store is on xyz.myshopify.com, enter only “xyz”. Then, click on save to proceed.
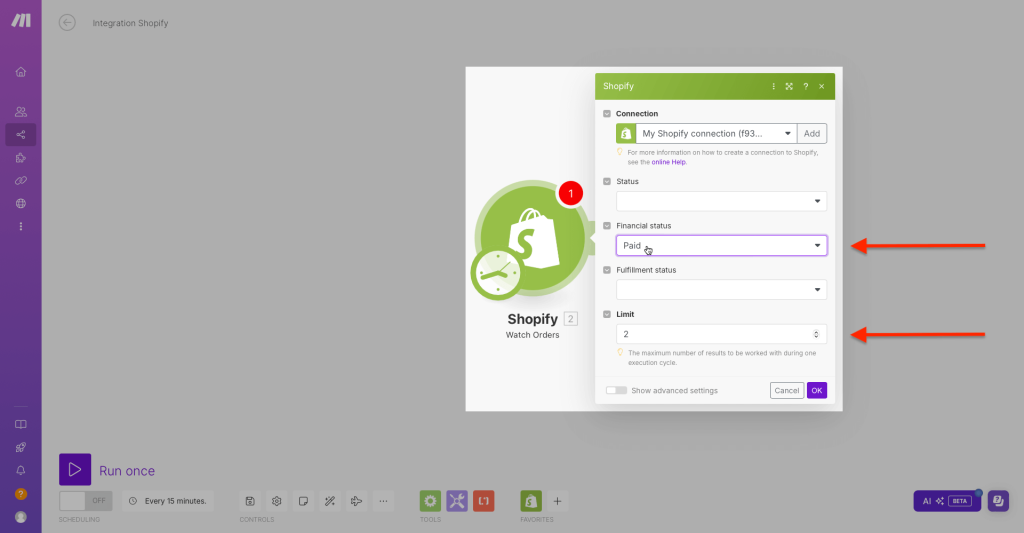
- Complete your trigger settings. For the sake of this article, we’d like to give access to our collection when the transaction is complete, therefore we will choose “Paid” for financial status.
The number of Shopify orders checked per automation scenario is set to 2 by default. You can increase this by changing the “Limit” if you’d like.
When you’re done configuring your trigger, click on OK and move to the next step.
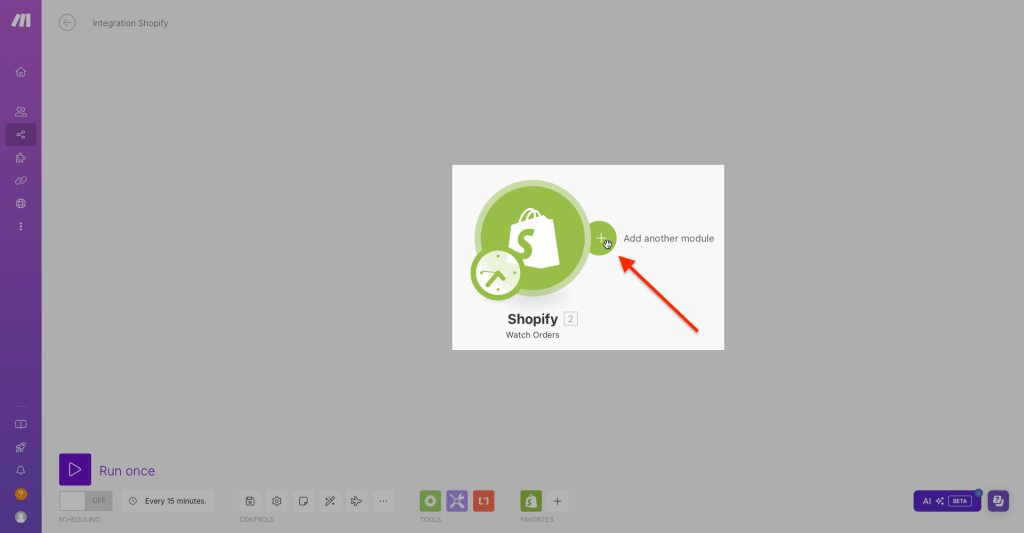
- Click on the plus icon as shown in the image below to add another module.
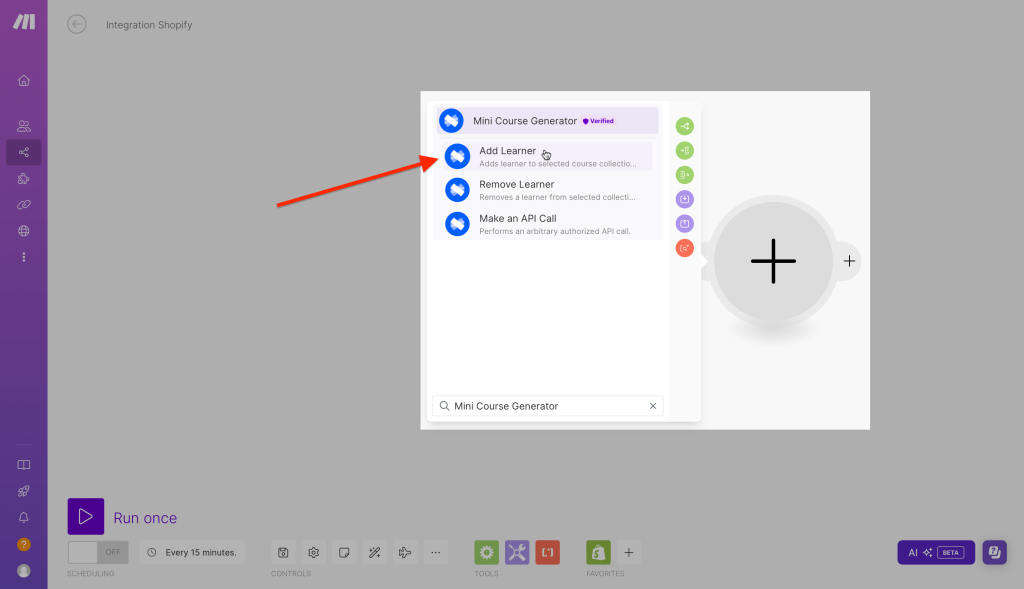
- Choose Mini Course Generator for application and “Add Learner” for the event of your second module.
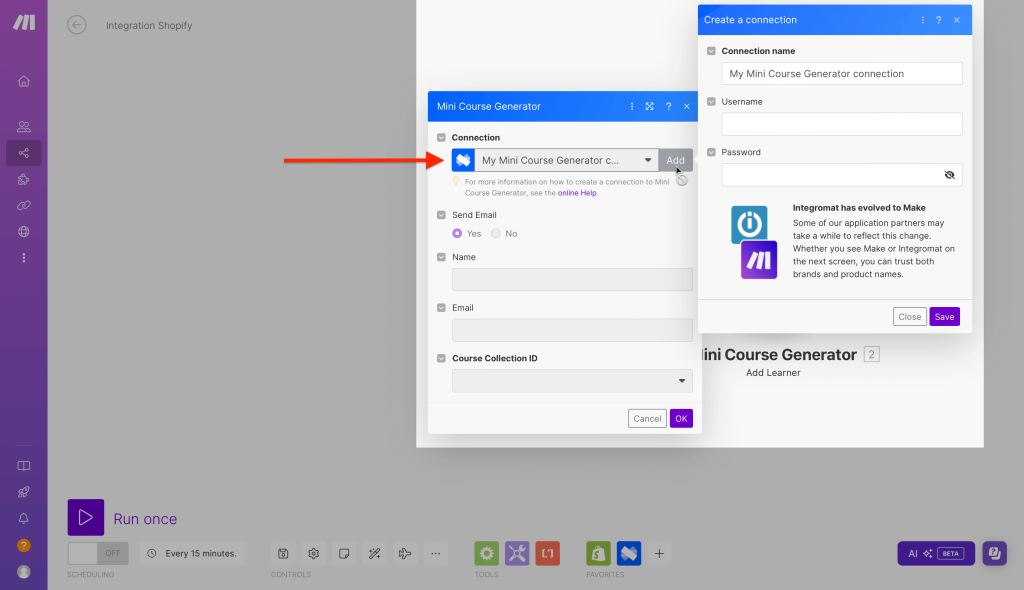
- Choose which Mini Course Generator account to use from your list of connections, or click on “Add” to create a new connection. Enter your email address and password credentials of your MCG account to add a new connection.
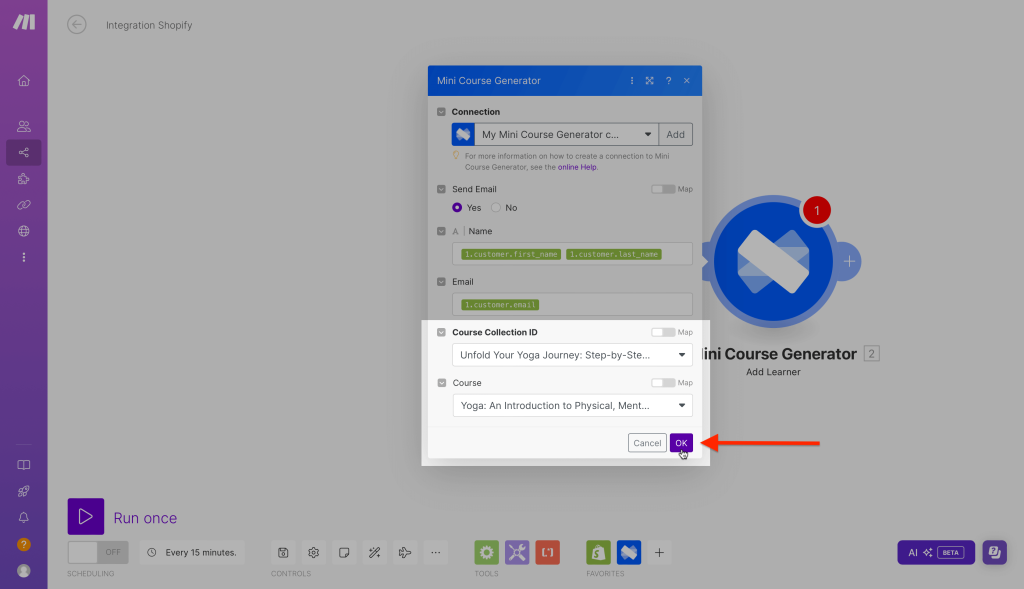
- Complete your action settings.
If you choose “Yes” for “Send Email” option, the learner receives an invitation email at their email address when the automation scenario works.
If you choose “No” for “Send Email”, the learner receives the invitation email when they first interact with your content.
Invitation emails are for verification purposes only. The magic link included in the invitation email verifies the learner’s email address when clicked on, directs the learner to the content and expires, therefore only allows access to the collection once. Unverified email addresses cannot access your collection of mini courses, ensuring that your content can be reached exclusively by your learner group.
For your learners that won’t be able to complete the content in one sitting, or would like to revisit your content later on, make sure to share your content with your learners. For example, you can customize the invitation email to include the share link to your content in the email body. Other solutions would be embedding the collection in a webpage, or pinning the share link where your learners can reach again and again.
💡You can customize and translate the invitation email to languages other than English. Please check our article “Enable access to specific learners” for further details.
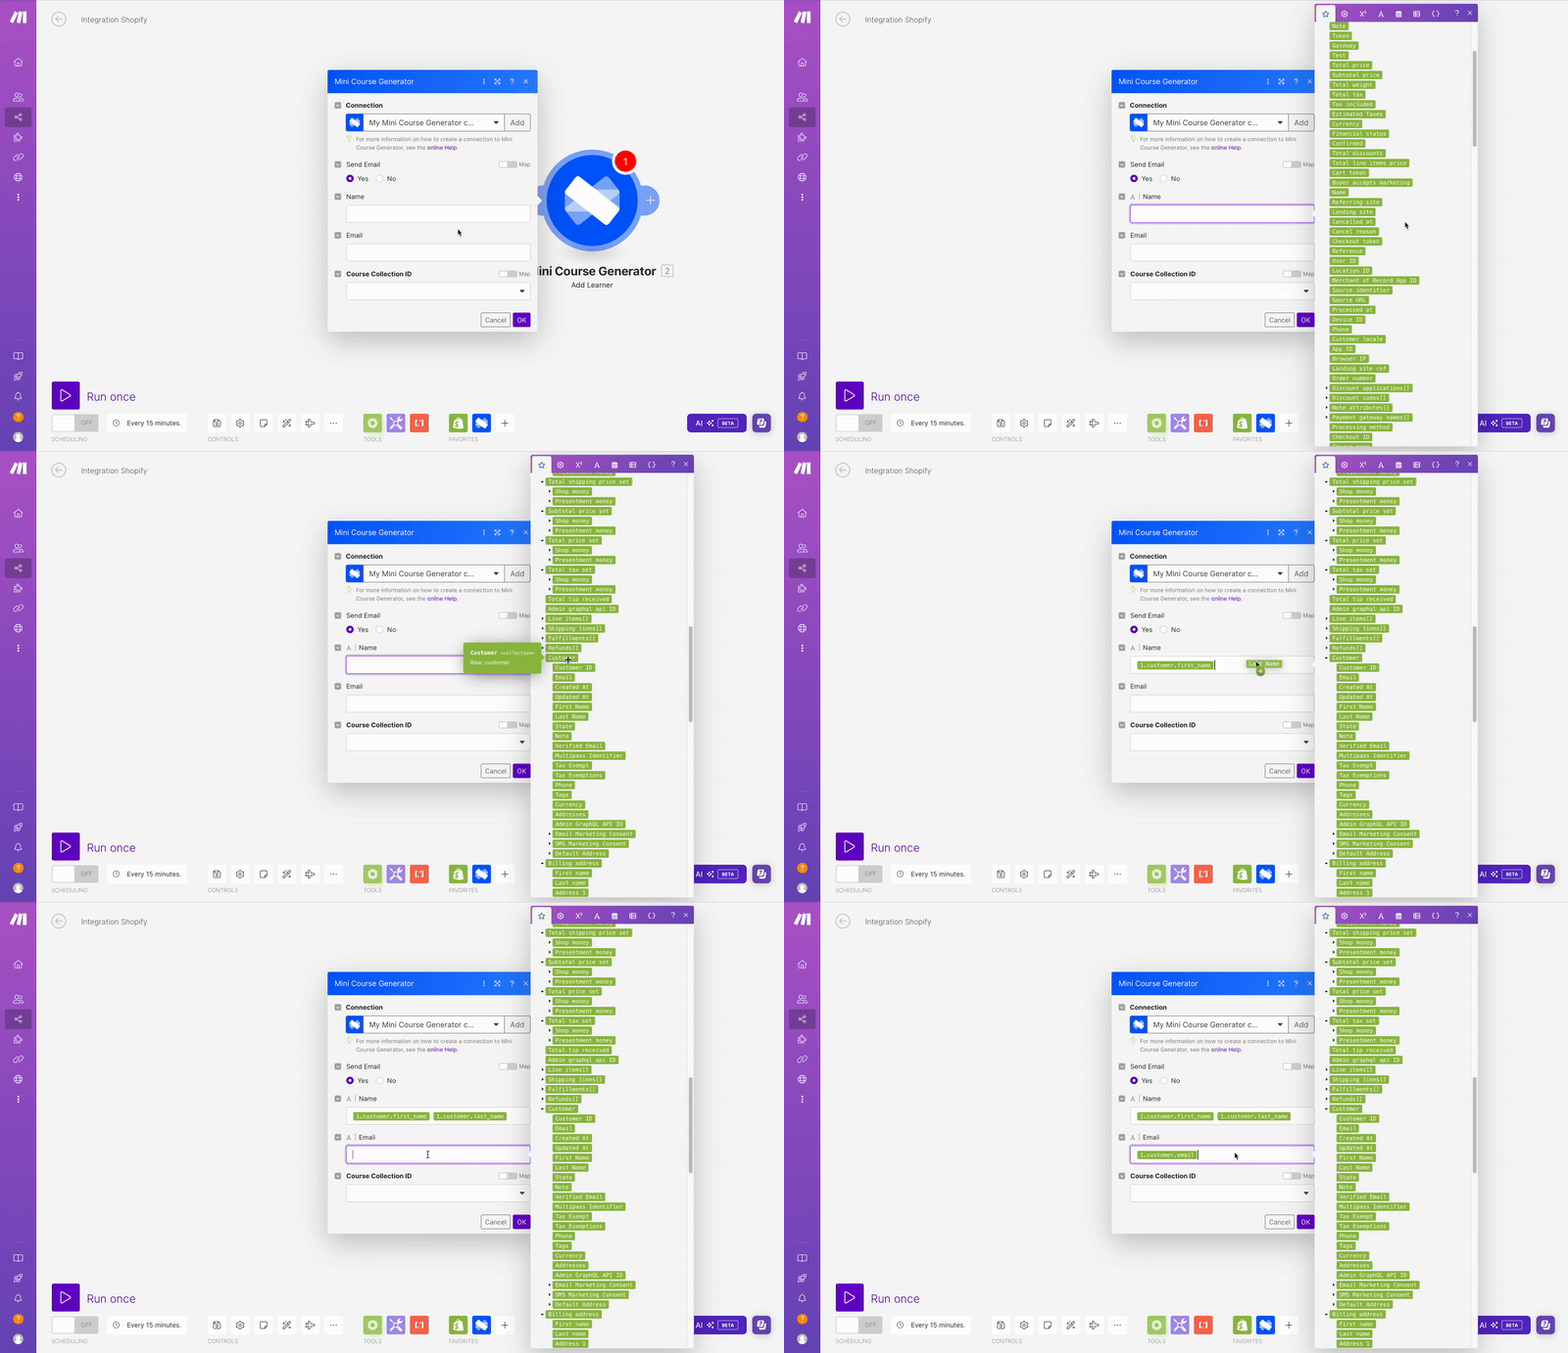
Collect “Name” and “Email” data from Shopify. You can find the correct data to collect under “Customer” menu in the pop-up, as shown in the GIF below.
👀 Put a space in between your “customer_first_name” and “customer_last_name” data. Otherwise, your new learner’s name will be as such: “FirstnameLastname”.
Choose the collection to give access to your new learner, and any mini course in that collection. When you’re done, click on OK.
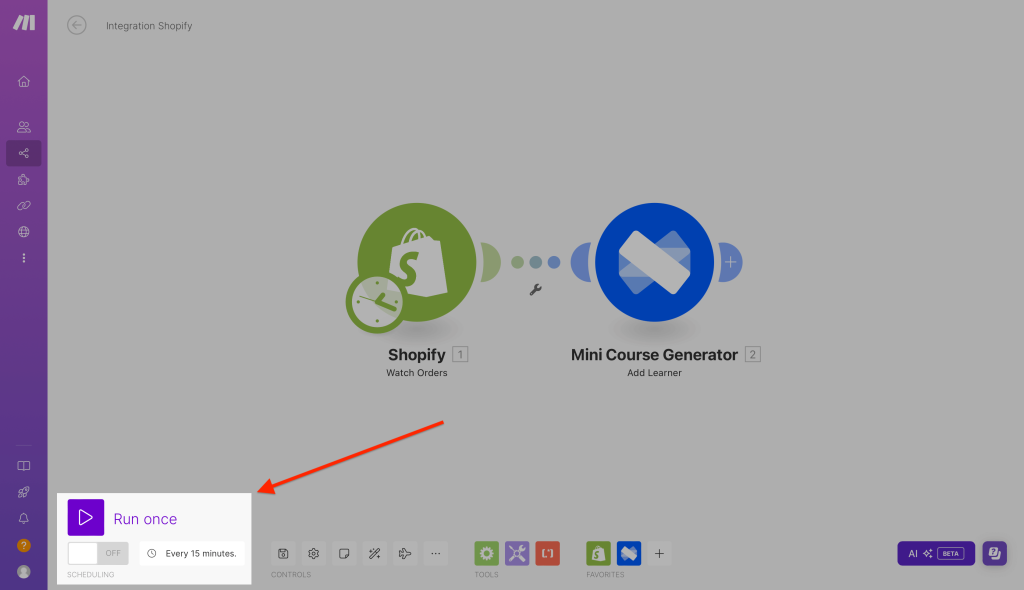
- At the bottom left of your scenario, you can set how often your automation repeats. When you’re done, click on “Run once” to test your automation, and turn your automation on by clicking on the toggle.
Great, from now on your Shopify customers will seamlessly access your collection of mini-courses!


