Enabling access to specific learners helps you limit the people who can access your content to learner groups in your Mini Course Generator account. When this feature is turned on, only those who are in your selected learner groups can access your collection.
If you are looking to:
- share your collection of mini-courses exclusively with an existing group of learners from a training program or workshop,
- sell your mini-courses using options other than what Mini Course Generator provides (e.g. Paypal or Shopify),
- create automations that include granting access to specific learners after specific actions,
- customize your invitation email to your new learners,
- time-limit your learners’ access to your content
enabling access to specific learners is the best gateway setting for you.
Setting up your gateway #
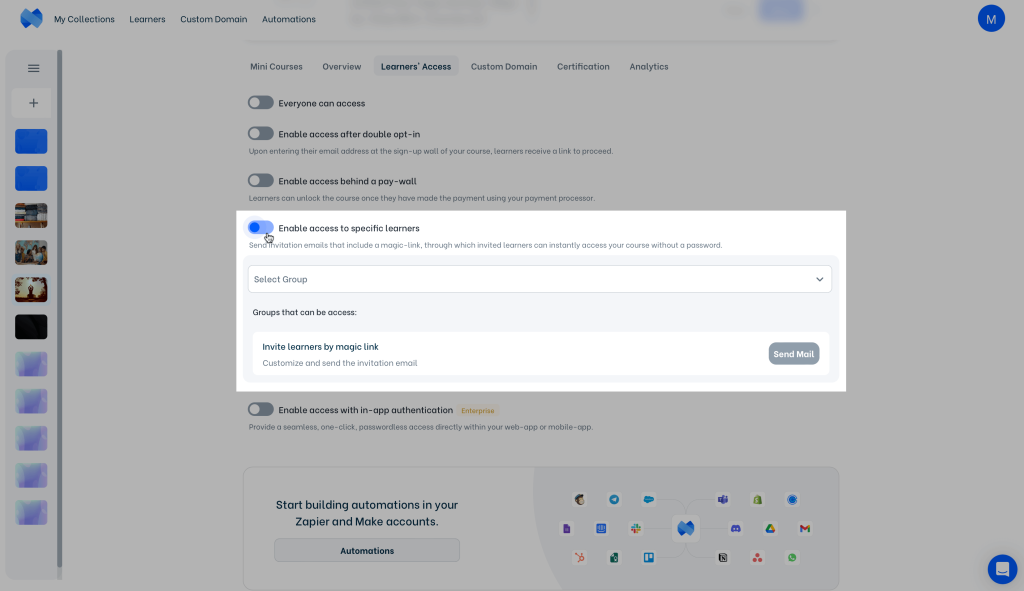
- Set your Learners’ Access setting as “Enable access to specific learners”.
👀 Note: This gateway setting modifies access to your whole collection. If you are looking to use this for a single mini-course, create a new collection, move the mini-course into the new collection and then enable this setting.
< 
- Adjust your learner group.
Click on “Learners” at the top of your admin dashboard to see the learners for each different collection. You can edit the learners of a group, rename a group or delete it. You can also create a new group.
Click on a group to see learner data of that group. You can export the list of learners as well as import a list of learners. Click on “New Learner” to add a learner to your group.
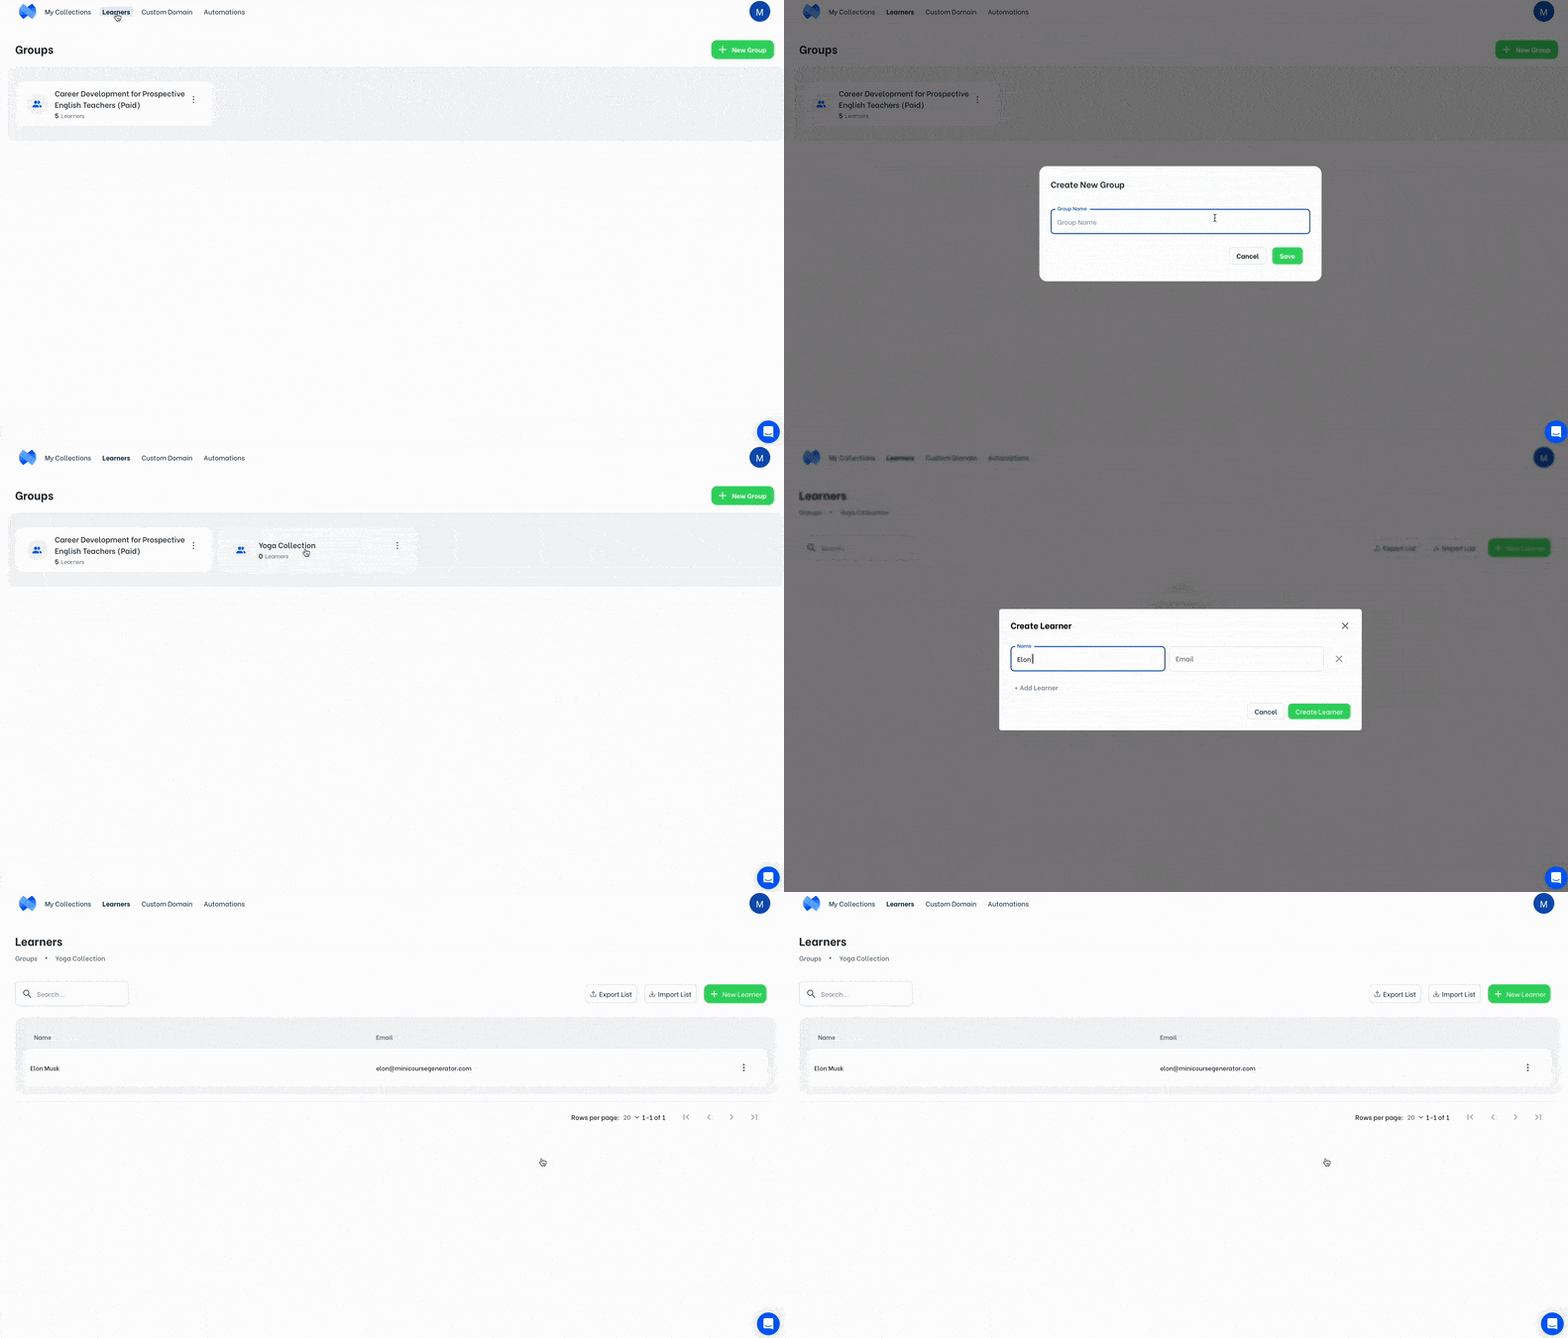
🔹 If you have a list of learners ready, it’s possible to import a CSV file to add as many learner as you’d like altogether. The imported CSV file needs to be formatted as follows:
-
- First row first column value should be “Name” and learner names should be listed under this column.
- First row second column value should be “Username” and the values in this column should match learner email address.
- First row third column value should be “Email” and learner email addresses should be listed under this column.
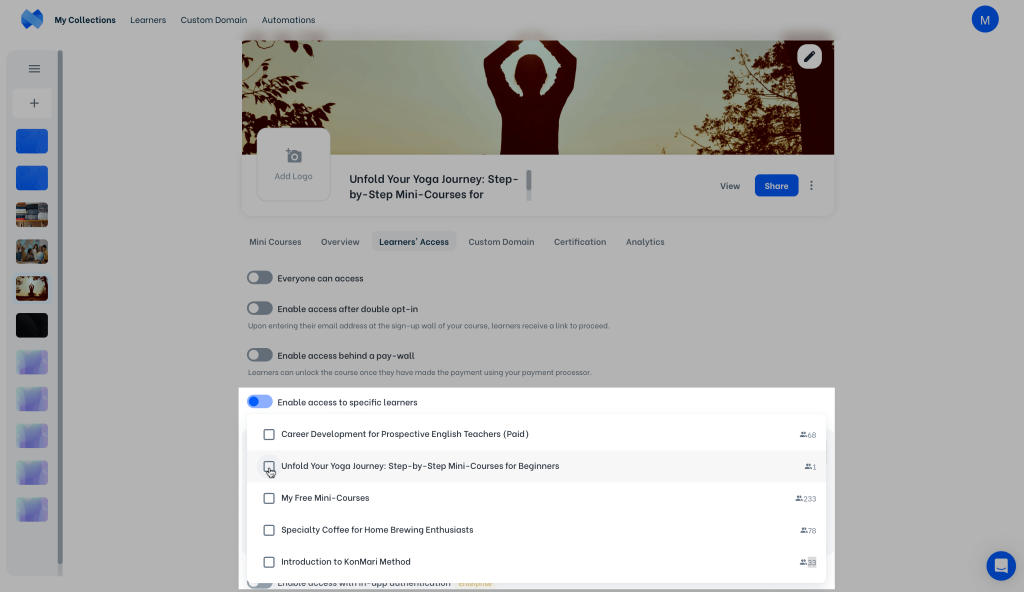
- Choose your learner groups to give access to.
You can choose more than one learner group to give access to your collection.
- Edit your invitation email body and send it to your learners.
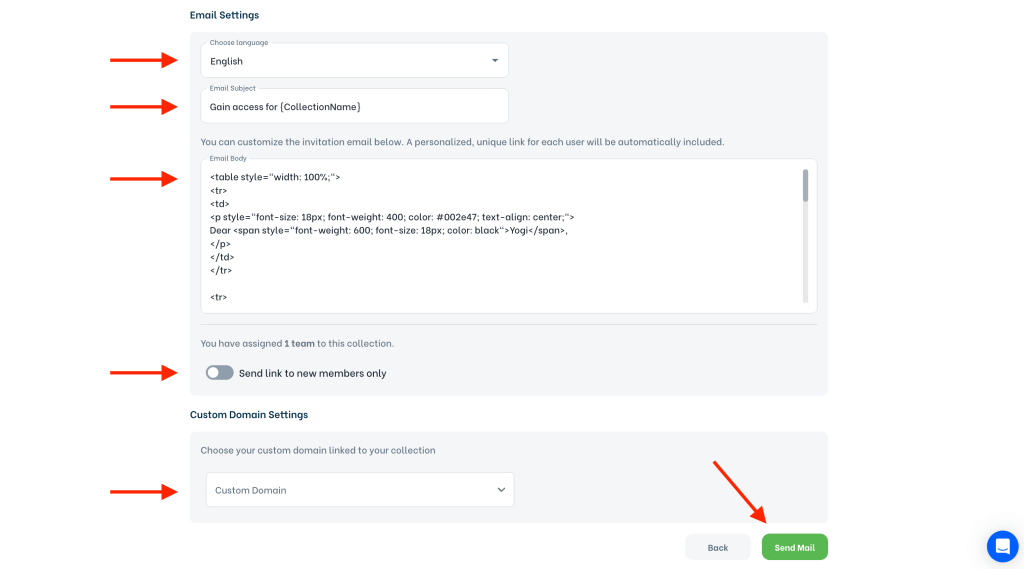
After choosing your learner group, click on “Send Mail” to edit and send invitation email to your learners.
Mini Course Generator supports 23 languages besides English. Click on “Choose Language” to instantly translate your invitation email.
Invitation emails are customizable. Make changes in the Email Subject or Email Body area to personalize your invitation emails.
When “Send link to new learners only” toggle is on, only learners who are new receive the email you send.
If you have a custom domain added for this collection, you can choose the custom domain to be used for the magic link provided in the invitation email. Check here for further details on adding a custom domain.
Once you click on “Send Mail”, each learner gets a single time use only link to access your mini-course. A learner that is in your learner group can always access the mini-course from different devices or browsers.
Invitation emails are for verification purposes only. The magic link included in the invitation email verifies the learner’s email address when clicked on and expires, therefore only allows access to the collection once. For your learners that won’t be able to complete the collection in one sitting, or would like to revisit your content later on, make sure to share your collection with your learners through somewhere they can reach repeatedly.
PS: You can choose to include the share link in your email body, pin the share link wherever you market your content (e.g., Discord, Instagram, Youtube etc.). If you own a domain, you can add a custom domain for an easier URL to remember, or embed the content in your webpage. These options will allow verified learners to access the content again and again.
How to edit your email body #
This is how an invitation email looks like originally:
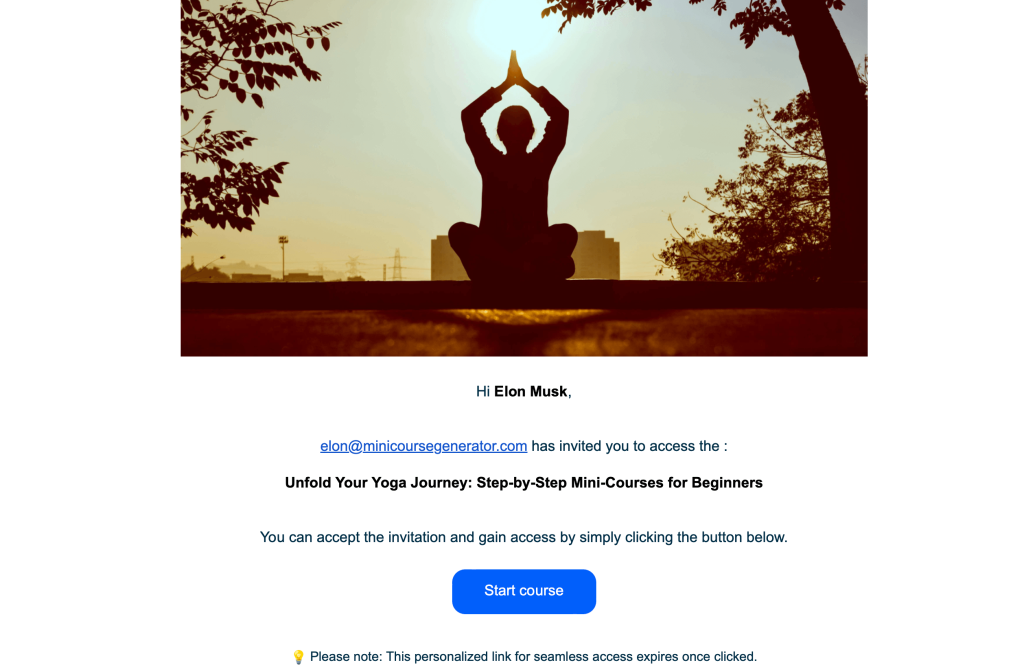
If you’d like, you can make changes in this invitation email to welcome your new learners in your own way. Below you can find some exemplary changes we’ve made for the sake of this article:
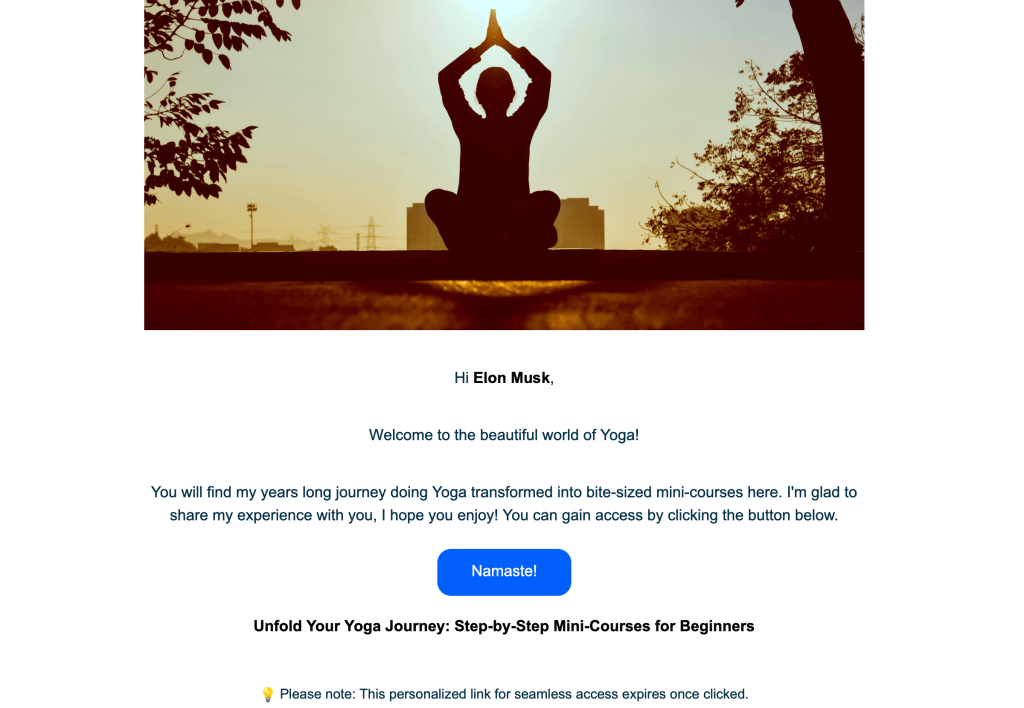
- Modify the Invitation: Remove “{InviterUsername}”, and copy the paragraph including “{CollectionName}”. Replace inviter username with the welcoming message “Welcome to the beautiful world of Yoga!”
- Adjust the Third Row: Keep the sentence “You can gain access by clicking the button below” but remove the rest of the sentence. Add the new sentence “You will find my years long journey doing Yoga transformed into bite-sized mini-courses here. I’m glad to share my experience with you, I hope you enjoy!” before the existing sentence.
- Update the Call-to-Action Button: Change the button’s text from “Start course” to “Namaste!”.
- Relocate the Collection Name: Remove “{CollectionName}” from within the table and add it as a separate paragraph below the table, using the following code:
<p style="font-weight: 600; font-size: 18px; color: black; text-align: center;"> {CollectionName} </p>
After following these steps, here’s how our invitation email looks like:
💬 Note: Changes you make in the invitation email body are saved automatically so that every new learner gets the same email.
How do learners access mini courses? #
We store learner information using browser cookies, so that learners can access your mini-courses again and again without the need of email address verification every time. If a new device or browser tries to access your collection, they will run into a pop-up that asks for full name and email address verification.
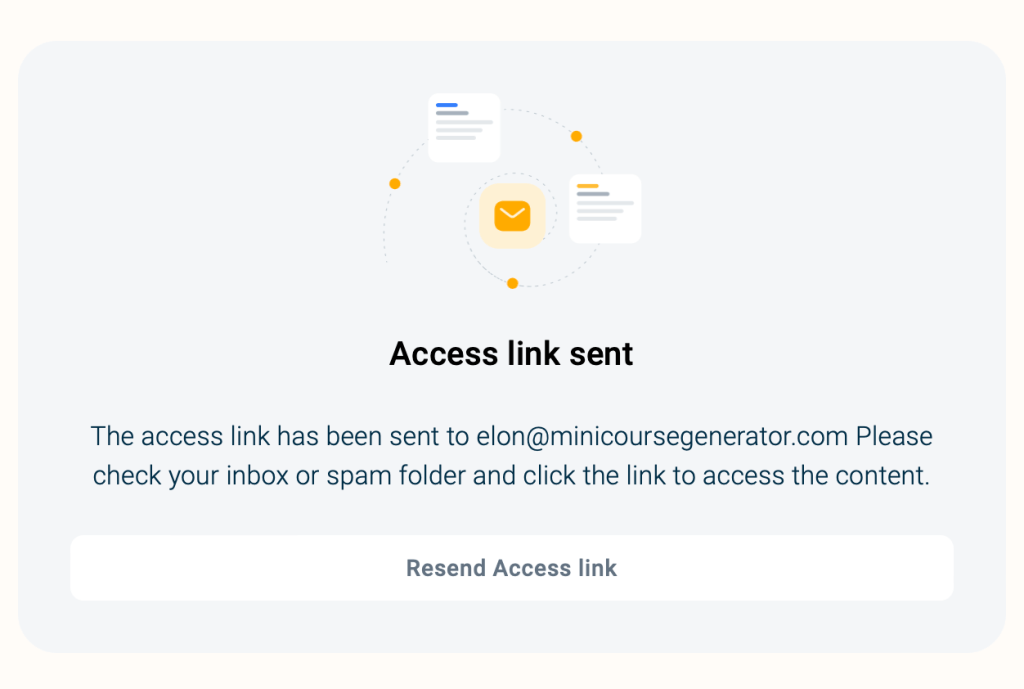
- If the information provided matches to a learner in your group, the learner gets a verification email sent at their email address to gain access.
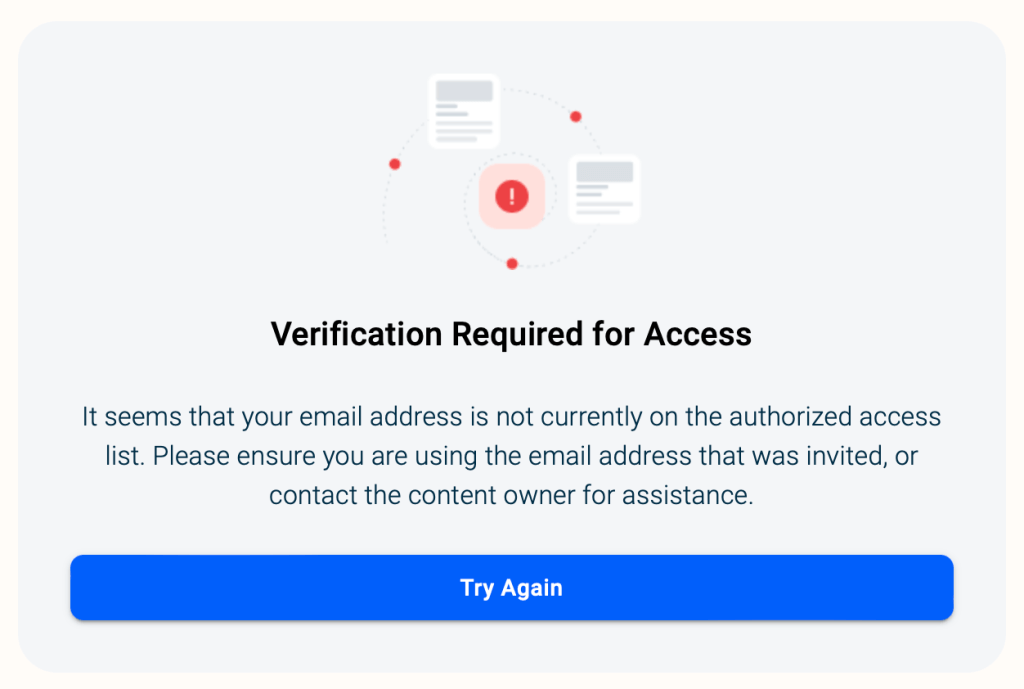
- If the information provided does not match to a learner in your group, the user comes across a pop-up that says their access is not allowed.
💡If you’d like to explore the automations you can use with this learners’ access setting, check our articles below:


